We had planned to visit a woodland site I've never been to before, but when we got close it was clear that it simply wasn't safe to proceed - far too wet. Although we had a little rain overnight I couldn't understand why the land was so wet - until several hours later when I figured out that the snow melt of the last month has saturated the ground in the east of the county and the steep clay slopes will take several months to dry out. So it was time for Plan B, which was a short diversion to a Launde Park Wood which has better access. We focussed on a steep east-facing slope covered in a mixture of Beech, Ash and Oak, sampling in the litter, under logs and brushing tree trunks.
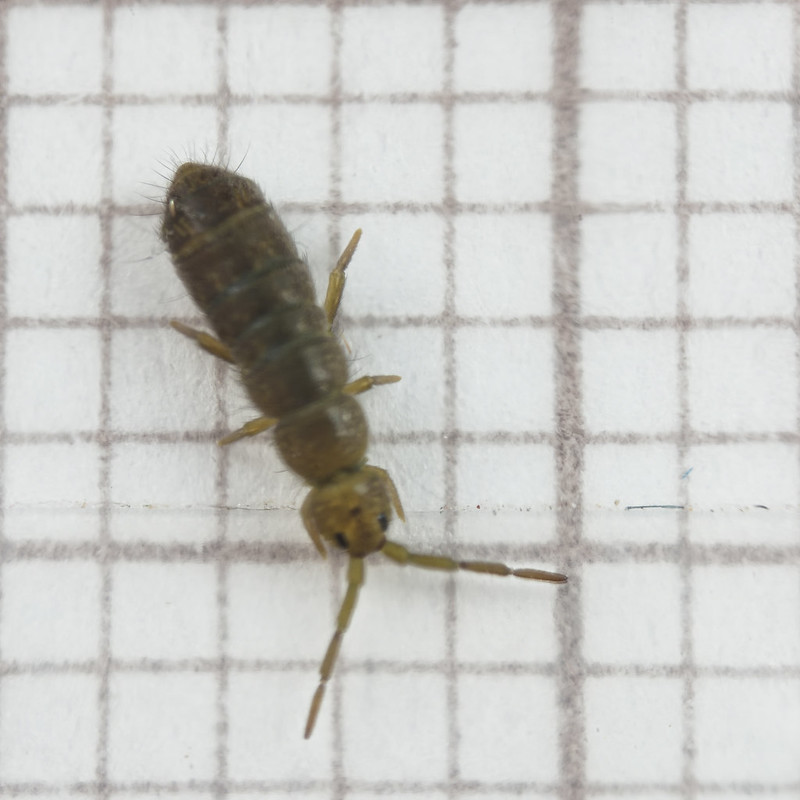
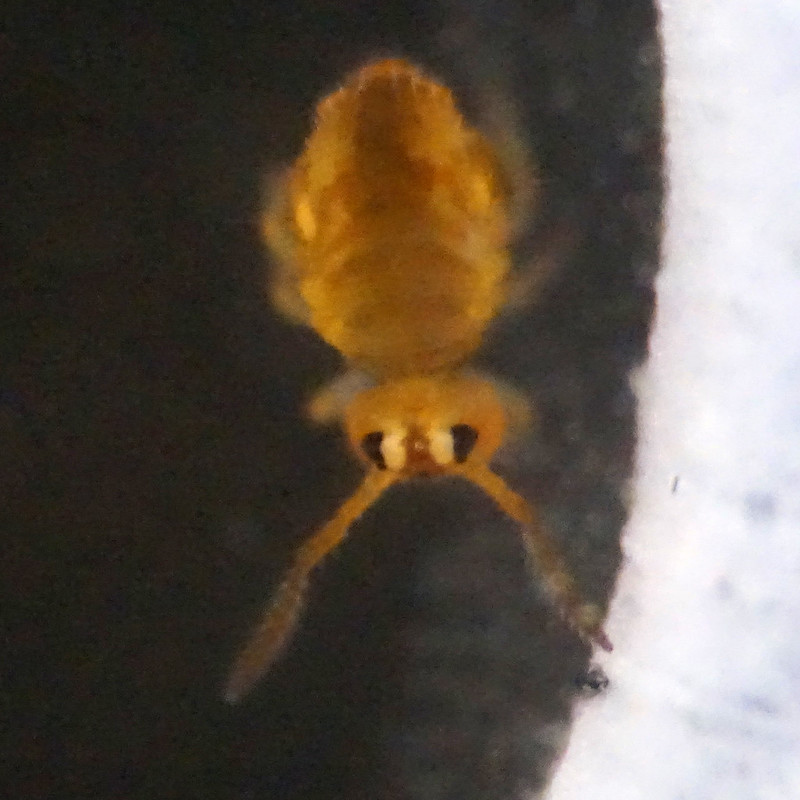
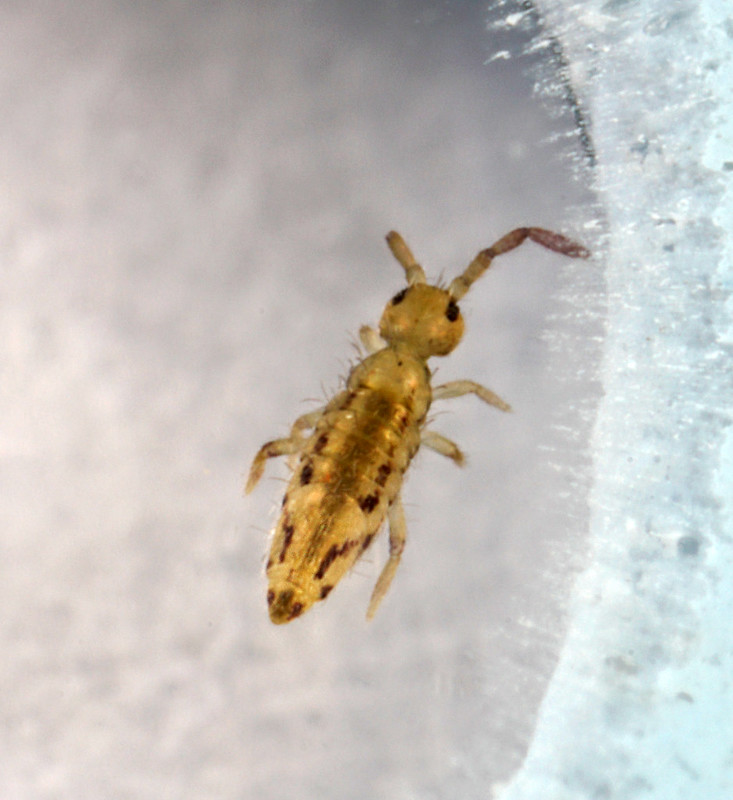
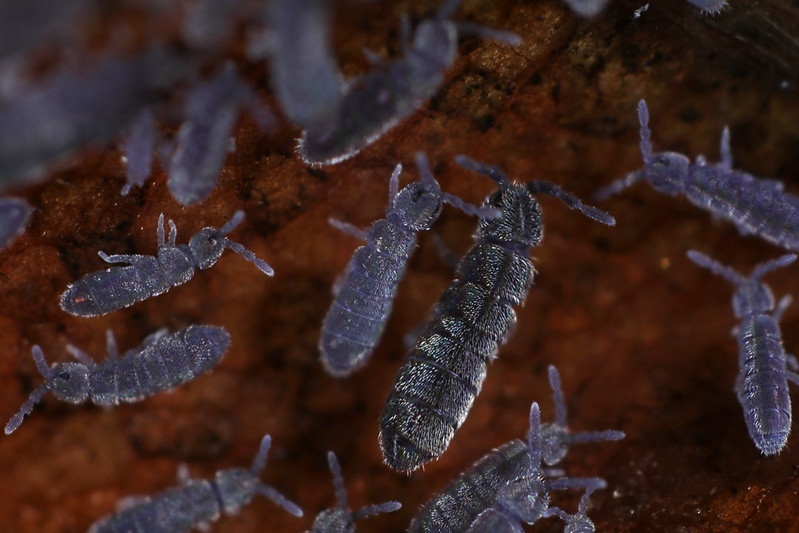
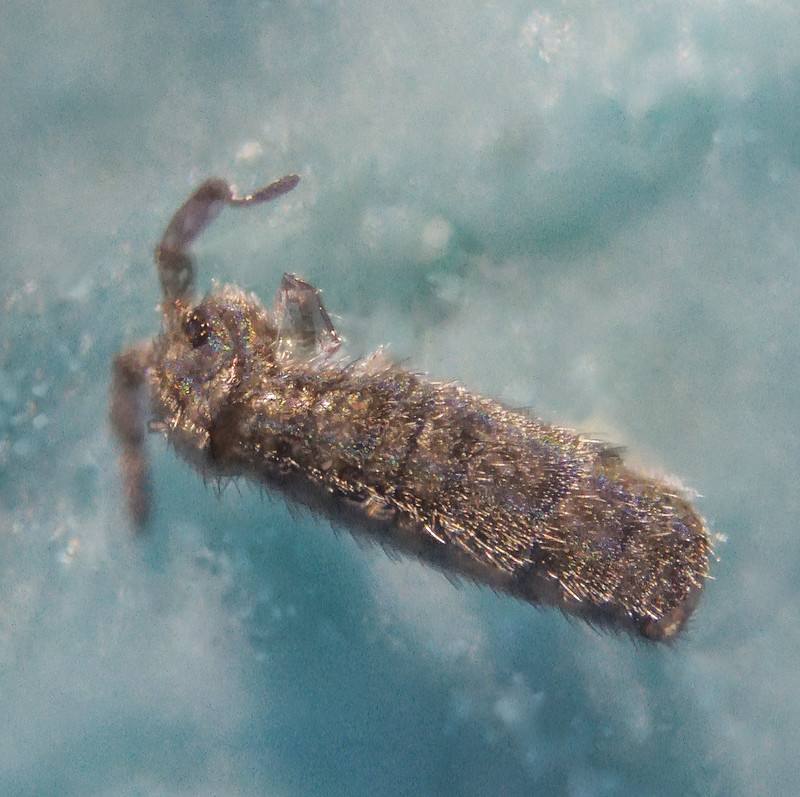
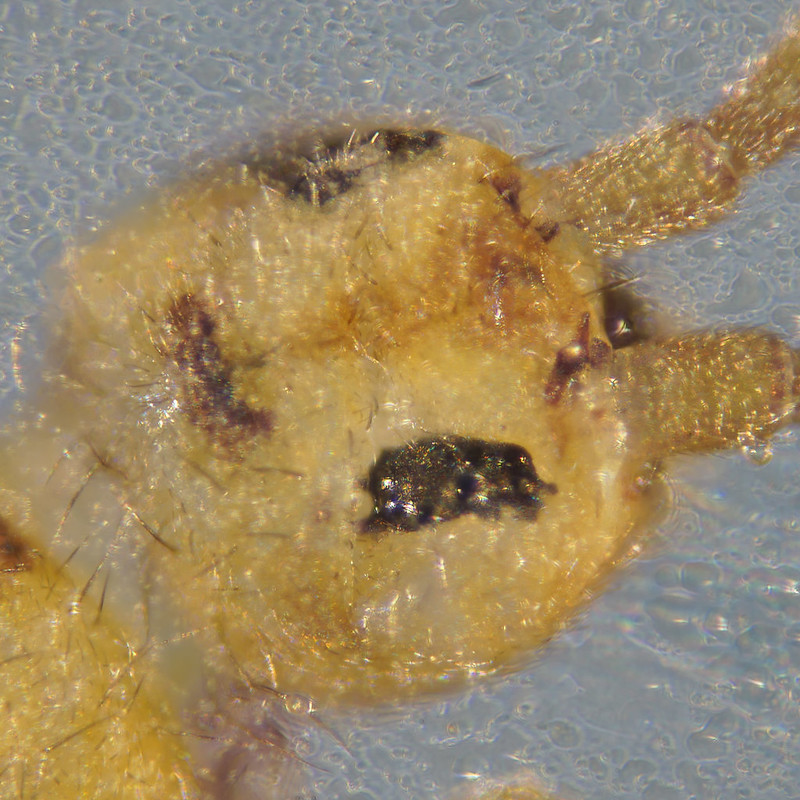
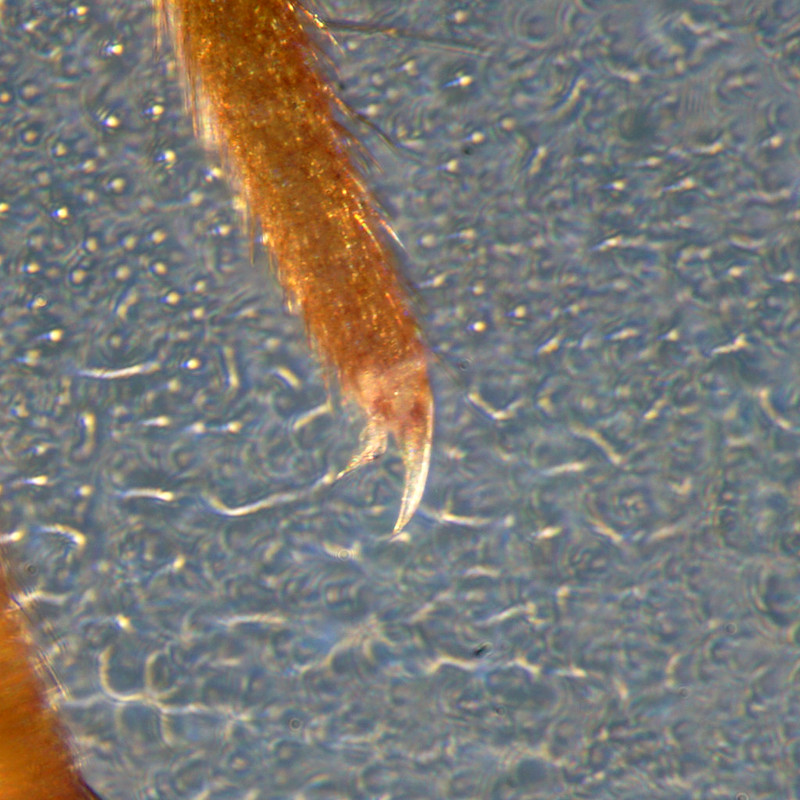
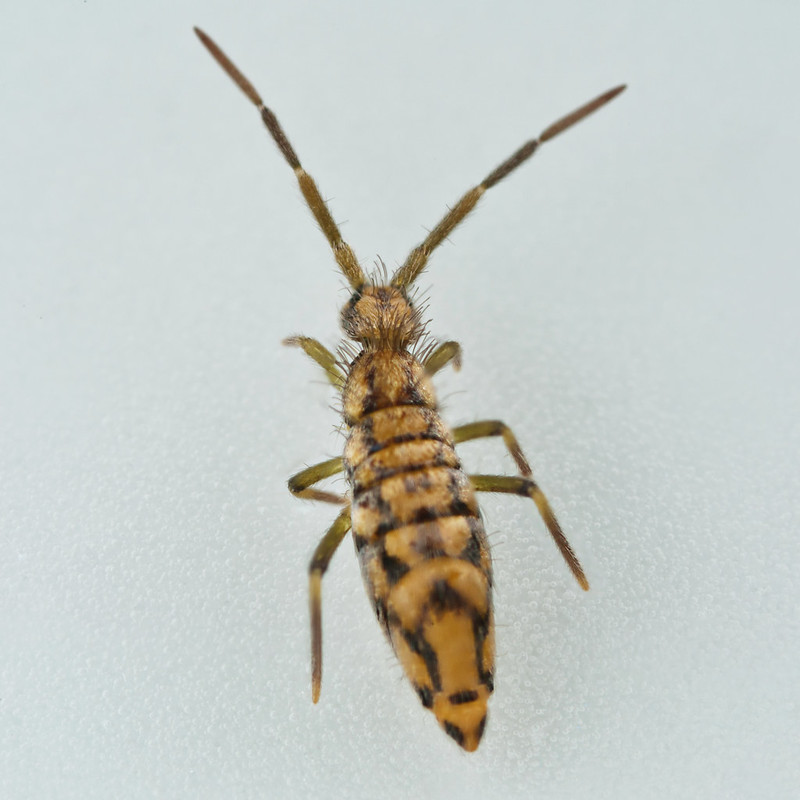
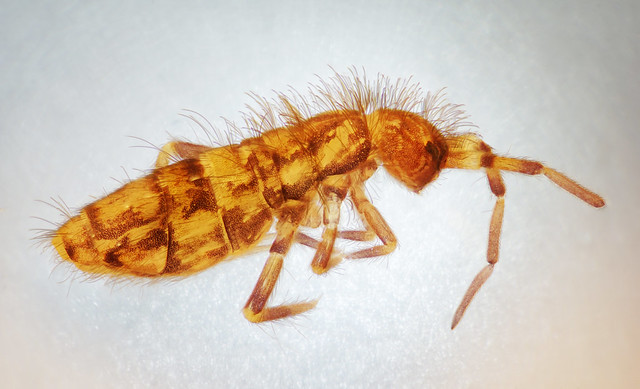
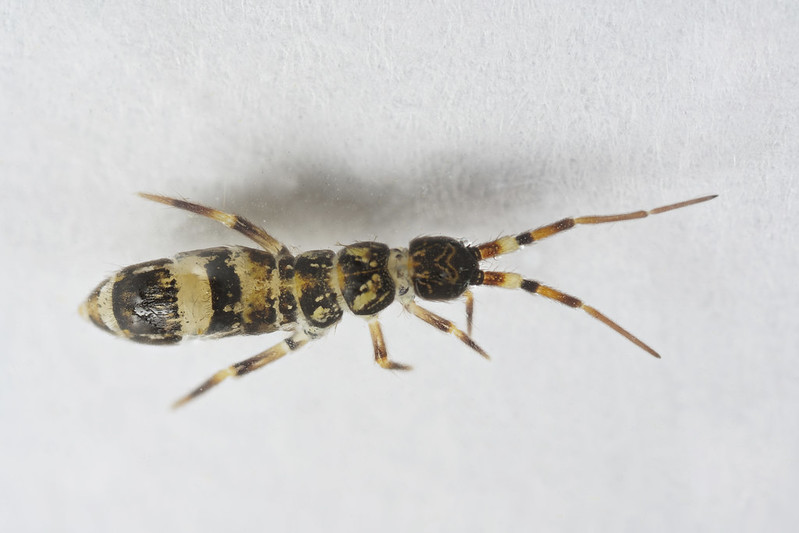
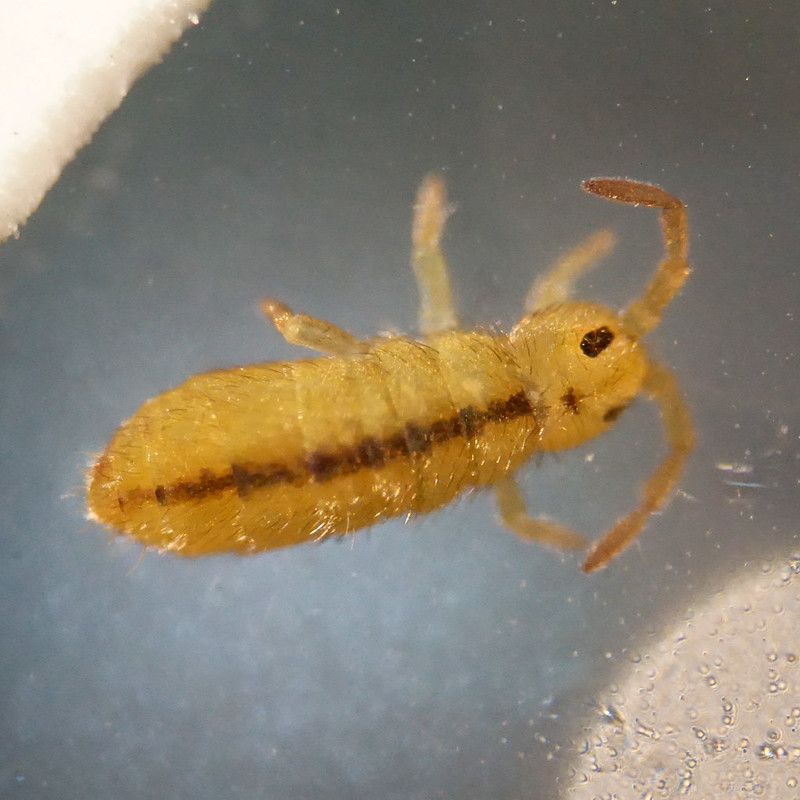
The predominant species in the leaf litter was Tomocerus minor. Orchesella cincta was by far the most dominant arboreal species with a few Entomobrya intermedia present, but we also turned up a single Isotomurus unifasciatus:
The distinction between Isotomurus palustris and I. unifasciatus is that unifasciatus has a continuous dark line down its midline but is otherwise uniformly pale, while palustris has a slightly discontinuous dorsal line and mottled patterning on the sides of its abdomen.
Nothing terribly exciting, but given that no-one has ever recorded any springtails at all from this nature reserve, it's a start.
Saturday, 31 March 2018
Thursday, 29 March 2018
Symphylans - who knew?
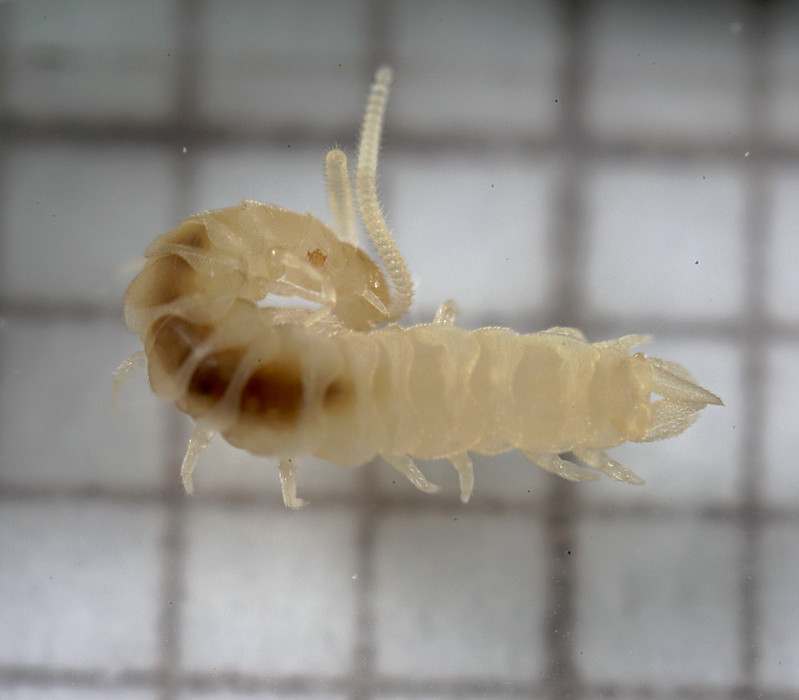
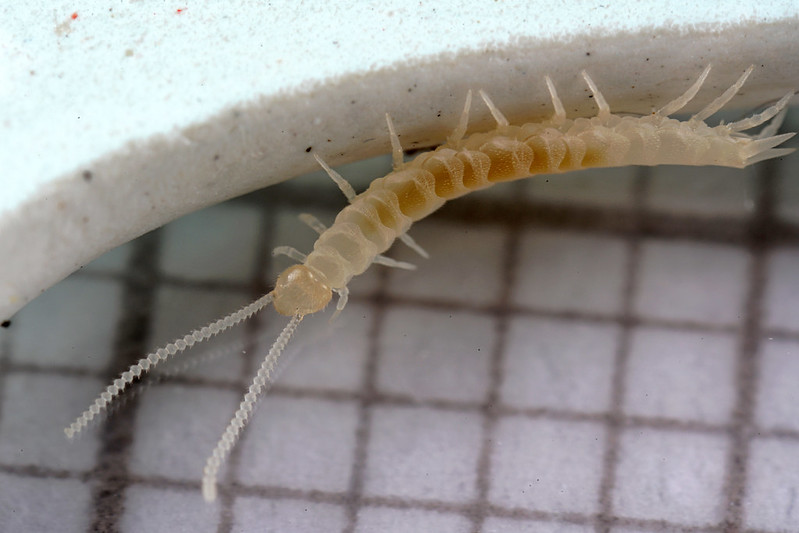
Scutigerella spp?
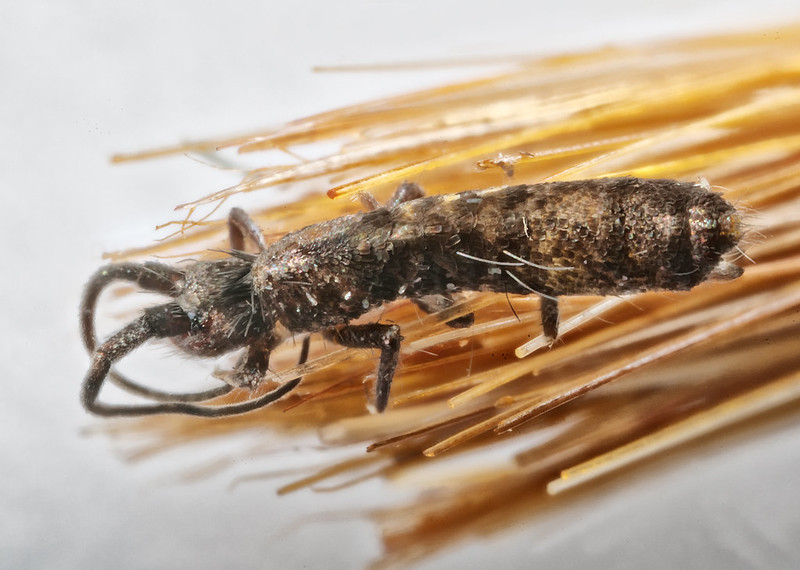
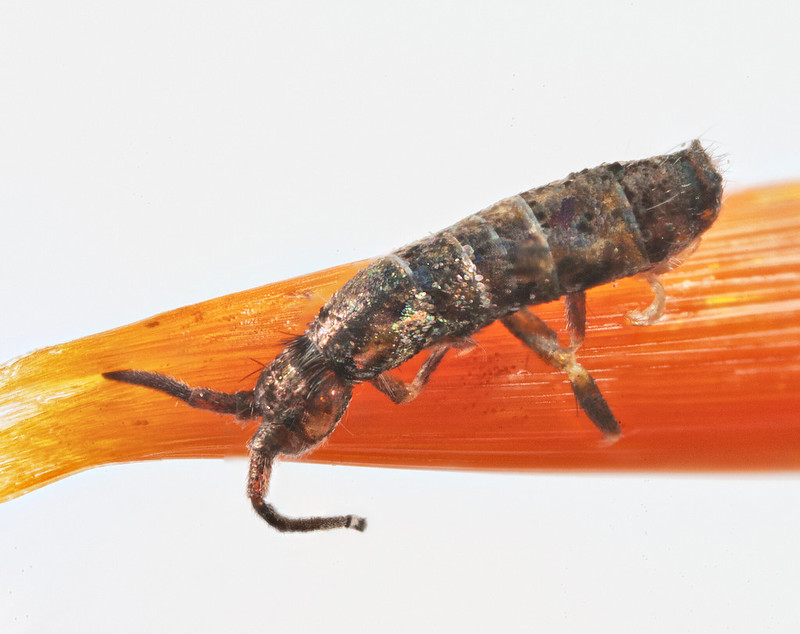
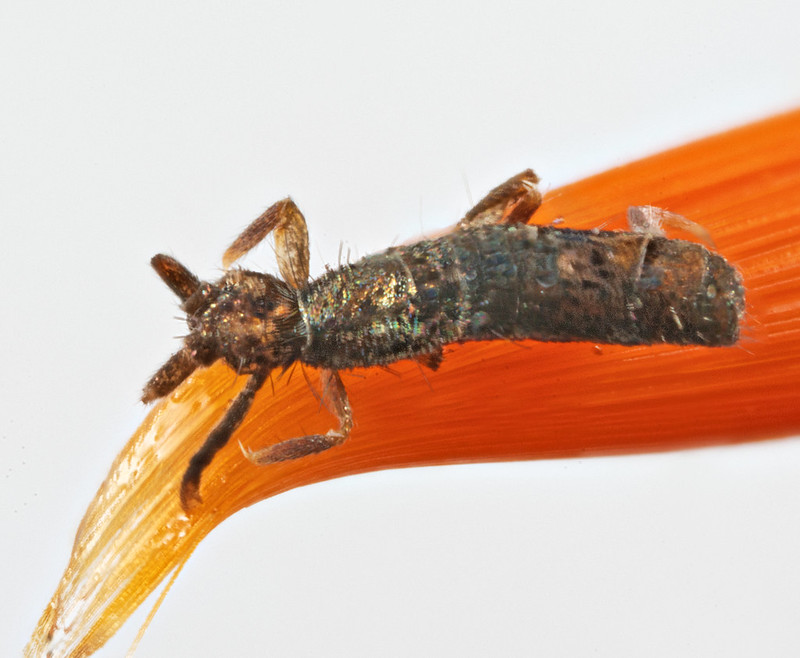
I was out in the woods recently looking for Diplurans (it's still a bit too early, not surprising considering we had snow on the ground a couple of weeks ago and have had some hard frosts). I found a lot of "minibeasts" - several under each log I looked under - and got excited, thinking I'd hit the Dipluran jackpot. Until I counted the legs. Hmm, given that Diplurans are hexapods ... 12 pairs of legs ... something not right here! I heard Alec Guinness in my ear "These are not the soil arthropods you're looking for". I took a few photos and moved on, assuming they were juvenile centipedes. Not expecting to be able to identify them to species level, I showed the photos to the wise men at the BMIG, who gently and kindly informed my these were Symphylans. What? You mean there's a whole Class of Myriapods that I've never heard of? Turns out there is:
Phylum: Arthropoda
Subphylum: Myriapoda
Class: Chilopoda - centipedes
Class: Diplopoda - millipedes
Class: Pauropoda - small millipede-like arthropods
Class: Symphyla - garden centipedes or pseudocentipedes
It also turns out (as I found out in the woods) that Symphylans are incredibly common - one of the most common animals in soil (Eisenbeis, G., & Wichard, W. (2012) Atlas on the biology of soil arthropods. Springer Science & Business Media). So why had I never heard of them? Because they've never been on a David Attenborough programme (Dear Sir Dave, don't you think it's a bit of an oversight that you've never talked about the commonest animals in Britain and probably the world? Yours, AJC). Steve Hopkin was doing a bit of work on this group before his untimely death (Hopkin, S.P. & Roberts, A.W. (1988) Symphyla – the least studied of the most interesting soil animals. Bulletin of the British Myriapod Group 5: 28-34). So I hit the literature and found out a bit more, including the features needed to identify them, but by then it was too late.
Scutigerella spp?
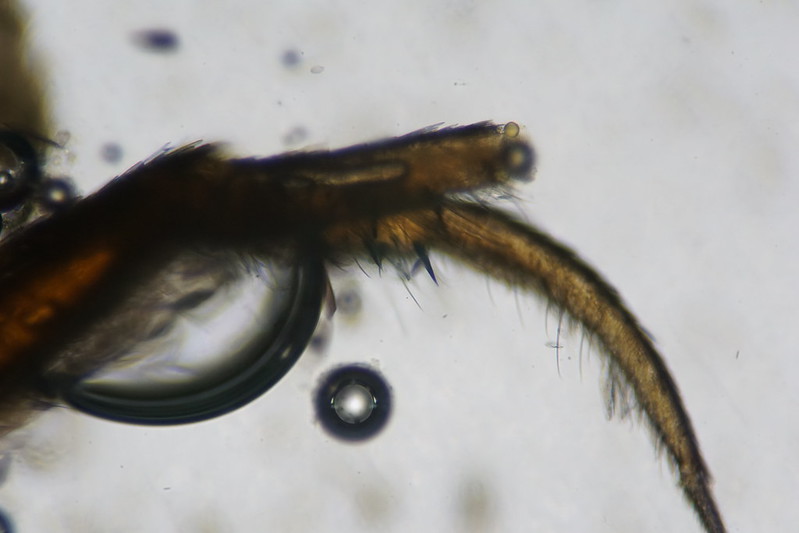
But I'll definitely be keeping an eye open for Symphylans in future. Identifying these beasties is a challenge - some features used by certain keys (number of legs and antennal segments) are variable - they start out with 6 legs and add a pair each time they moult, ending up with 10-12 pairs as adults (same thing with the number of antennal segments), but chaetotaxy and the features of the cerci are doable, so I'll be giving it a go. "Springtails of Leicestershire and Rutland" has a bit more of a ring to it than "Soil Arthropods of Leicestershire and Rutland", but if I manage to make any progress, expect to see more Symphylans popping up here.
Labels:
Diplura,
Steve Hopkin,
Symphyla
Wednesday, 28 March 2018
The Mysteries of Migration
Some species of springtail can be reliably found in certain locations, e.g. Podura aquatica on the surface of ponds and puddles, Entombrya nivalis on tree trunks, etc. But most species can turn up anywhere where there is a suitable environment, e.g. enough moisture to prevent desiccation. For these species, "Everything is everywhere but the environment selects" seems to apply. But considering how small springtails are, how do they get everywhere?
Steve Hopkin (Hopkin, S.P. (1997) Biology of the springtails: (Insecta: Collembola) OUP Oxford) quotes examples of Hypogastrura socialis migrating more than 300 m in a single day using the sun as a navigation aid, and species of Entomobrya, Onychiurus, Sminthurus and others being captured on sticky traps or nets towed from aircraft at heights of over 3000 m. At certain times of year some species are known to ascend to the tree canopy and can then presumably be blown considerable distances on the wind, easily crossing barriers such as roads and rivers.
Never underestimate a springtail!
Labels:
Entomobrya,
Hypogastrura,
Onychiurus,
Sminthurus,
Steve Hopkin
Tuesday, 27 March 2018
21.03.18: Cemetery Wanderings
Welford Road Cemetery is a little oasis of biodiversity close to the centre of Leicester. Nearly 300 species have been recorded in the grounds, but apart from occasional bioblitz events it's not clear that there has ever been any systemic recording of springtails on the site (not that that's unusual). Although the temperatures had picked up (nearly in double figures) it was very dry and I did not find any arboreal springtails on tree bark or vegetation. All finds were retrieved from under logs, and in one case, from a large fallen (and well decayed) bracket fungus which was harbouring large numbers (dozens) of Pogonognathellus longicornis:
Mixed in with them were a few Tomocerus minor:
Note that unlike Pogonognathellus, ant3 and ant4 do not taper in Tomocerus, but I checked the I.D. by confirming tridentate spines on the dens of the furcula (not shown here).
Moving on to the smaller species, I found one Isotoma viridis, another very common species, but never recorded at this site before:
And one Sminthurinus aureus (ditto):
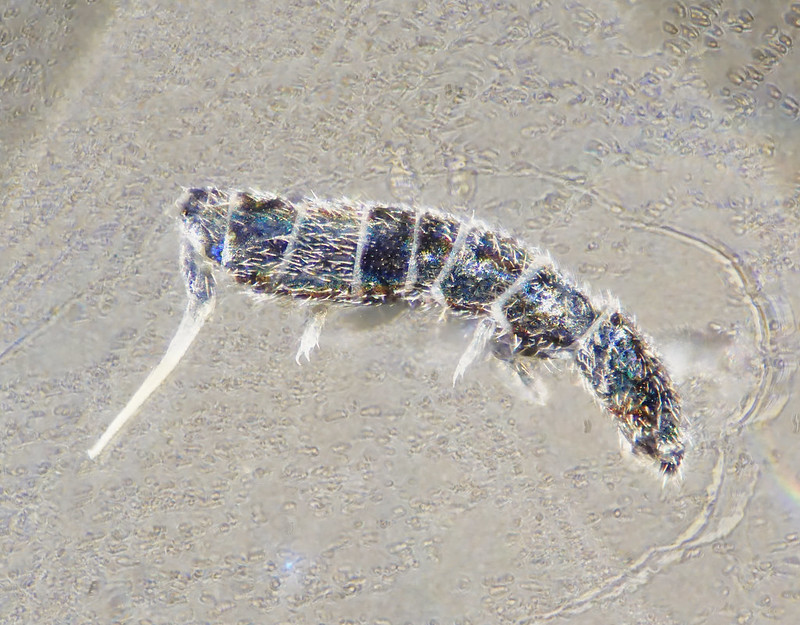
And then I did something stupid. There were several of these ~1mm, dark isotomids. I completely failed to recognize these and Frans Janssens was kind enough to point out to me the blue iridescence and the pale legs = Vertagopus arboreus. In my defence, I was viewing them in artificial light where the iridescence was not obvious (unlike in daylight), and when I looked at the under the microscope, I didn't make the connection. A learning experience.
Labels:
field trips
Saturday, 24 March 2018
Identification Guide to the Tomoceridae
Springtails in the family Tomoceridae are some of the most frequently encountered species in the UK for two reasons - they are very common and they are large. For this reason, although better identification keys are available, I think it's worthwhile publishing this simple version - hope it helps. If you don't understand all the technical terms (e.g. dens, furcula) and need help I suggest searching Google for images.
To begin at the beginning.
1. Orders: Springtails can be divided into three groups:
2. Segmentation: The family Tomoceridae are part of the Entomobrymorpha. In the Tomoceridae, the third abdominal segment (abd3) is the longest, whereas in the Entomobryidae abd4 is longest. This characteristic is the first thing to look for and identifies a member of this family.
3. Antennae: All the Tomoceridae have relatively long antennae, but these are fragile and frequently break off so caution is needed unless all 4 antennal segments are present. In the Tomoceridae the third antennal segment (ant3) is longer than the others.
4. Antenna shape: All the species listed here were formerly in the genus Tomocerus but have now been split into two genera based on the shape of the antennae. If ant and ant4 taper towards the tip, go to 5. If the antennal segments do not taper significantly (nearly cylindrical), go to 6.
5. Genus Pogonognathellus:
In this genus, ant3 and ant4 taper towards the tip; ant3 is scaled, c.f. Tomocerus. The four anterior ocelli are in a diamond configuration. Pogonognathellus species have a pair of leaf-shaped scales at the base of the inside of the dens (c.f. Tomocerus).
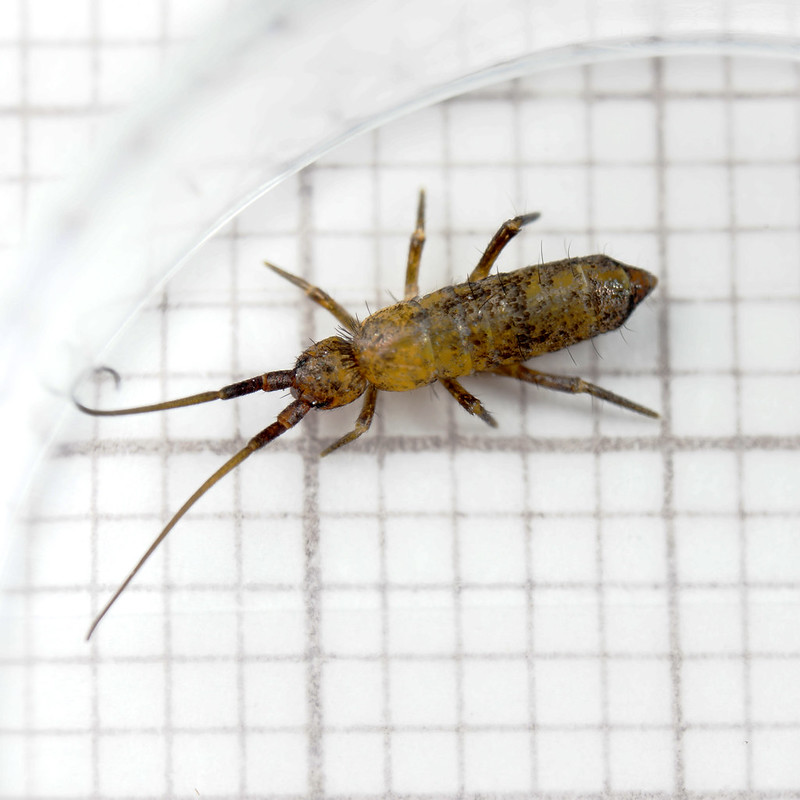
Pogonognathellus longicornis - very common, widespread. The antennae are longer than the body (including the head). This species frequently curls ant3 and ant4 into a tight spiral:
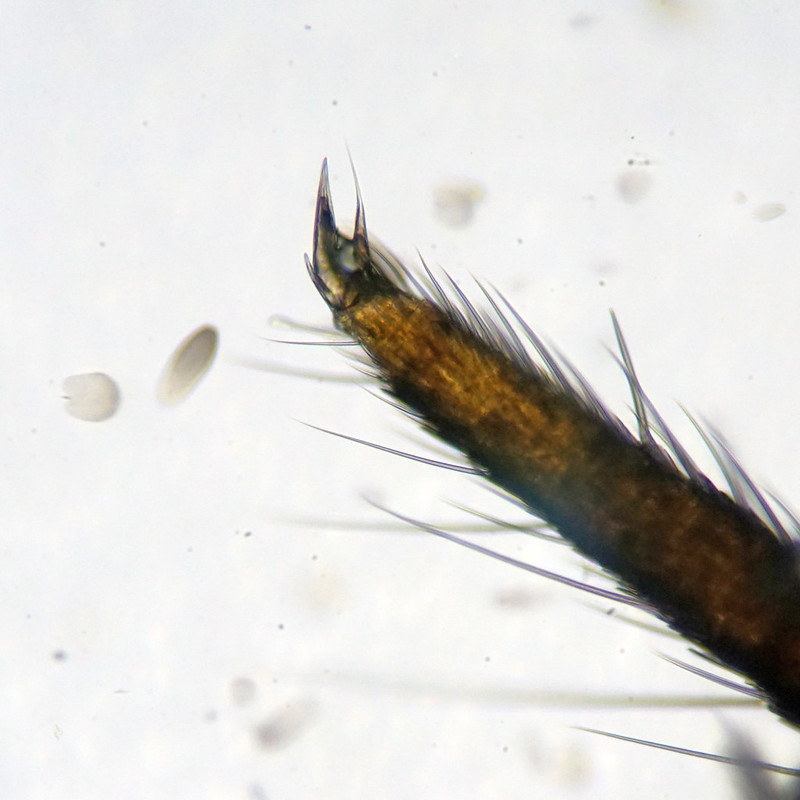
In addition, the empodium is about 1.2 times as long as the claw due a thin filament on its tip (c.f. P. flavescens (rare) - no filament on any empodium):
Pogonognathellus flavescens - scarce, a more upland species.
The antennae taper but the intact antennae are shorter than the body (including the head):
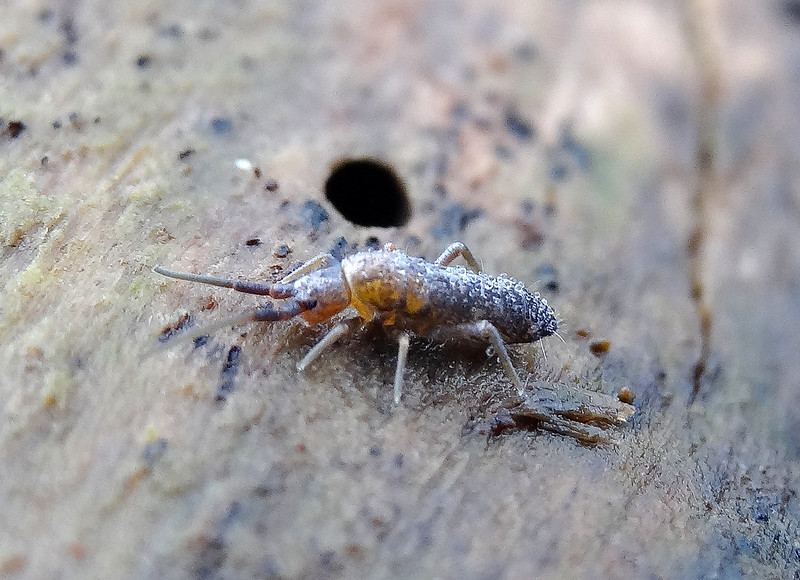
Note that in spite of the name, yellow colouration is not characteristic for this species - see below. If in doubt (e.g. if the antennae are broken, check the empodium (see above) which is shorter than the claw.
6. Genus Tomocerus:
In this genus the antennal segments do not taper significantly (nearly cylindrical). The four anterior ocelli are in a square configuration. Ant3 is not scaled and cannot curl (ant4 can be curled slightly).
Tomocerus minor - very common, widespread:
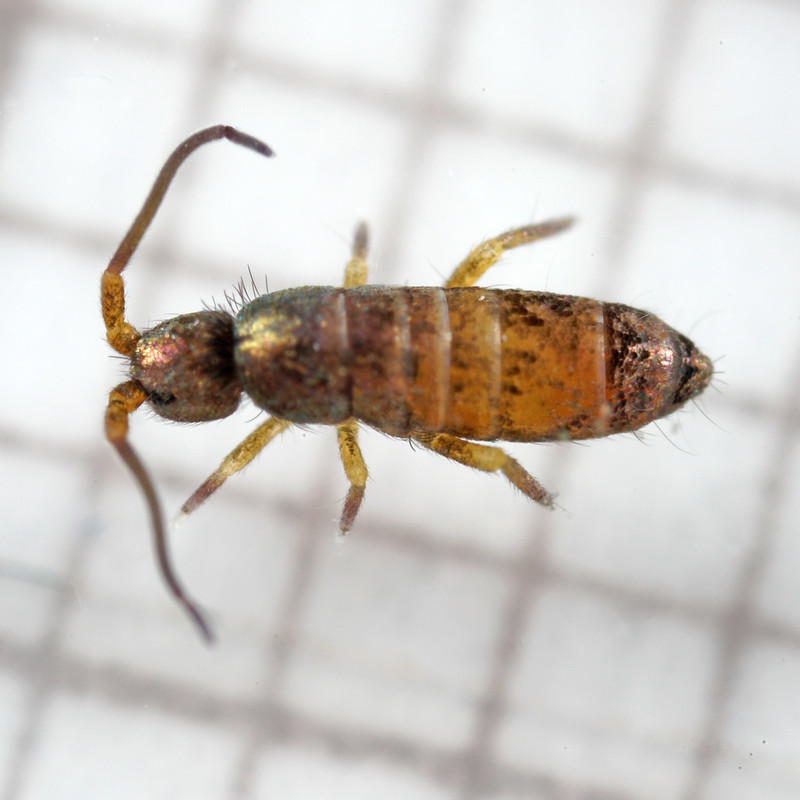
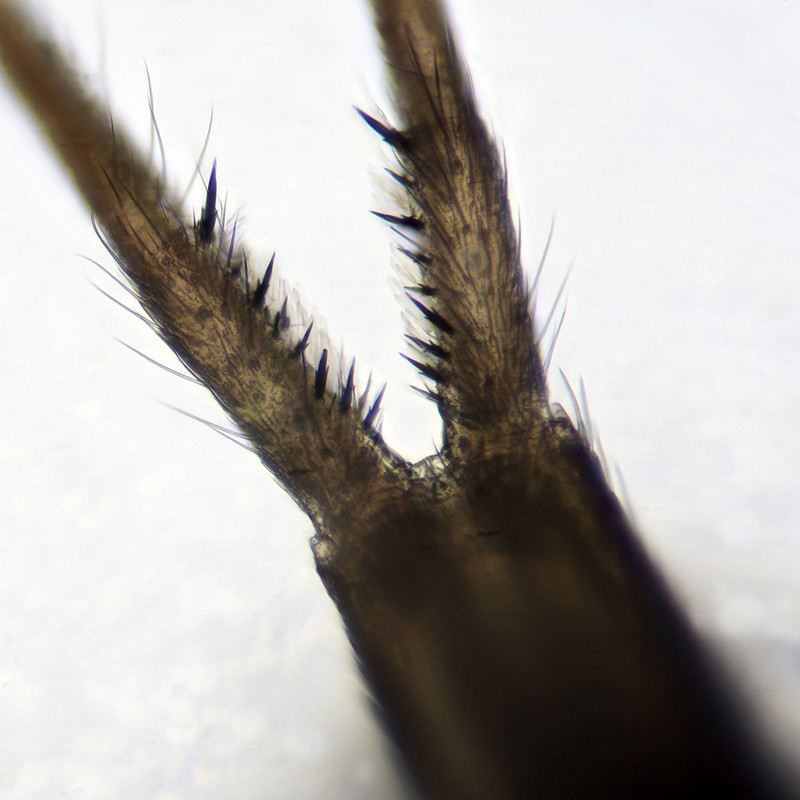
Separation this species from T. vulgaris requires examination of the spines on the dens (part of the furcula). In T. minor these are tridentate (three teeth):
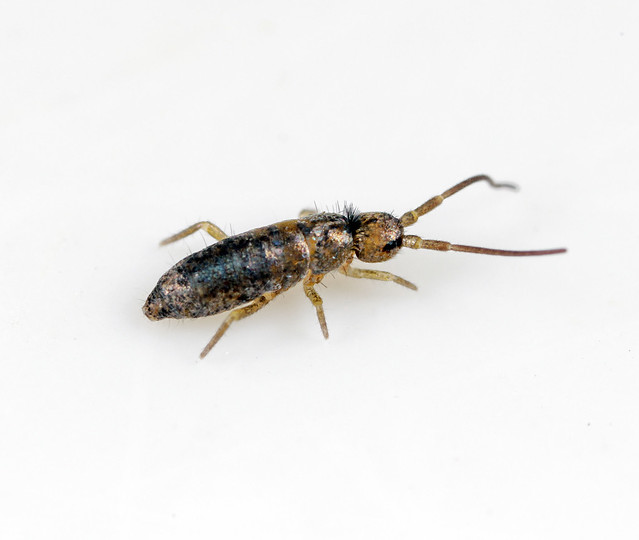
Tomocerus vulgaris - common, widespread. Characterised by transverse iridescent bands of scales in natural light (may not be visible with flash):
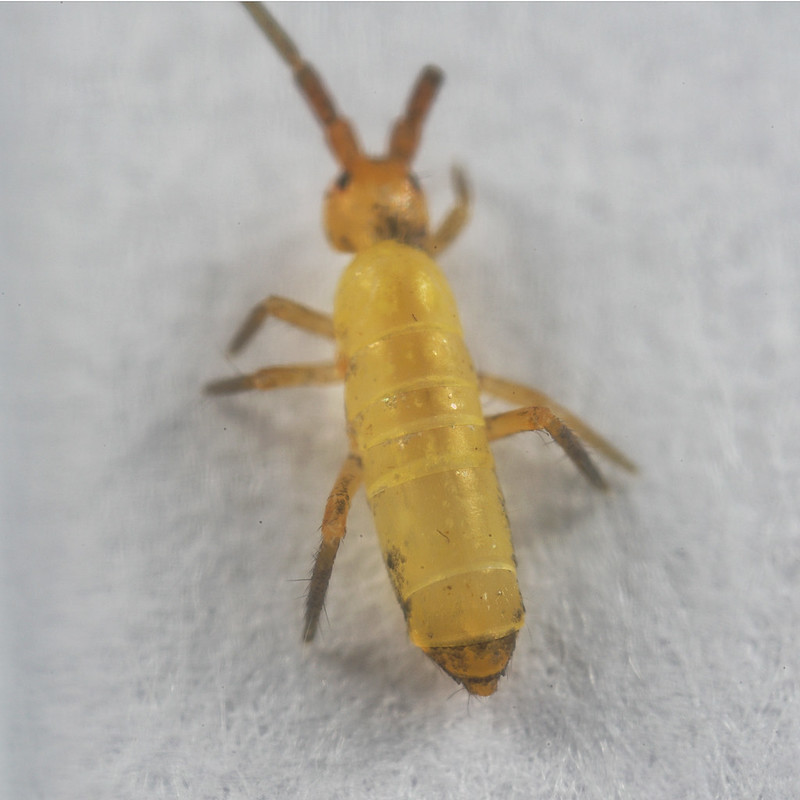
However the scales are easily lost - see below. Partially descaled T. vulgaris:
Tomocerus minor/vulgaris can only be accurately confirmed by the the presence of simple (rather than three-pointed) spines on the dens (part of the furcula). In T. vulgaris these are simple (no teeth on the spines, c.f. T. minor above):
There is one further UK species in this family, Tomocerus minutus, but this is extremely rare and has only been reported from mountain tops in Scotland and Wales. No specimens of this species exist, so it cannot be confirmed and should be ignored (unless you're on a mountain top and find a Tomocerus which does not look like any of the above). Unlike other Tomocerus and Pogonognathellus species which have have several teeth (up to ~9) on the mucro, T. minutus only has 1-2 teeth on the mucro.
The problem with scales
All the Tomoceridae are covered with dark and/or iridescent scales. At least, they start out with scales, but these are easily lost, revealing a golden body colour underneath. Scales and scale patterns are thus not a reliable identification characteristic in this group (and I should know, it's fooled me more than once!
Other Identification Guides: https://collembolla.blogspot.co.uk/p/identification-guides.html
To begin at the beginning.
1. Orders: Springtails can be divided into three groups:
- Globular springtails - rounded body shape
- Poduromorpha - equal sized body segments
- Entomobrymorpha - unequal sized body segments
2. Segmentation: The family Tomoceridae are part of the Entomobrymorpha. In the Tomoceridae, the third abdominal segment (abd3) is the longest, whereas in the Entomobryidae abd4 is longest. This characteristic is the first thing to look for and identifies a member of this family.
3. Antennae: All the Tomoceridae have relatively long antennae, but these are fragile and frequently break off so caution is needed unless all 4 antennal segments are present. In the Tomoceridae the third antennal segment (ant3) is longer than the others.
4. Antenna shape: All the species listed here were formerly in the genus Tomocerus but have now been split into two genera based on the shape of the antennae. If ant and ant4 taper towards the tip, go to 5. If the antennal segments do not taper significantly (nearly cylindrical), go to 6.
5. Genus Pogonognathellus:
In this genus, ant3 and ant4 taper towards the tip; ant3 is scaled, c.f. Tomocerus. The four anterior ocelli are in a diamond configuration. Pogonognathellus species have a pair of leaf-shaped scales at the base of the inside of the dens (c.f. Tomocerus).
Pogonognathellus longicornis - very common, widespread. The antennae are longer than the body (including the head). This species frequently curls ant3 and ant4 into a tight spiral:
In addition, the empodium is about 1.2 times as long as the claw due a thin filament on its tip (c.f. P. flavescens (rare) - no filament on any empodium):
Pogonognathellus flavescens - scarce, a more upland species.
The antennae taper but the intact antennae are shorter than the body (including the head):
Note that in spite of the name, yellow colouration is not characteristic for this species - see below. If in doubt (e.g. if the antennae are broken, check the empodium (see above) which is shorter than the claw.
6. Genus Tomocerus:
In this genus the antennal segments do not taper significantly (nearly cylindrical). The four anterior ocelli are in a square configuration. Ant3 is not scaled and cannot curl (ant4 can be curled slightly).
Tomocerus minor - very common, widespread:
Separation this species from T. vulgaris requires examination of the spines on the dens (part of the furcula). In T. minor these are tridentate (three teeth):
Tomocerus vulgaris - common, widespread. Characterised by transverse iridescent bands of scales in natural light (may not be visible with flash):
However the scales are easily lost - see below. Partially descaled T. vulgaris:
Tomocerus minor/vulgaris can only be accurately confirmed by the the presence of simple (rather than three-pointed) spines on the dens (part of the furcula). In T. vulgaris these are simple (no teeth on the spines, c.f. T. minor above):
There is one further UK species in this family, Tomocerus minutus, but this is extremely rare and has only been reported from mountain tops in Scotland and Wales. No specimens of this species exist, so it cannot be confirmed and should be ignored (unless you're on a mountain top and find a Tomocerus which does not look like any of the above). Unlike other Tomocerus and Pogonognathellus species which have have several teeth (up to ~9) on the mucro, T. minutus only has 1-2 teeth on the mucro.
The problem with scales
All the Tomoceridae are covered with dark and/or iridescent scales. At least, they start out with scales, but these are easily lost, revealing a golden body colour underneath. Scales and scale patterns are thus not a reliable identification characteristic in this group (and I should know, it's fooled me more than once!
Other Identification Guides: https://collembolla.blogspot.co.uk/p/identification-guides.html
Labels:
identification,
keys,
Pogonognathellus,
Tomoceridae,
Tomocerus
Thursday, 22 March 2018
These Three Are Not The Same
A local recorder asked if I would confirm the I.D. of some springtails they had collected in Leicestershire so they could be recorded. Although they were dead (and a bit desiccated) when I received them, they turned out to be three different species.
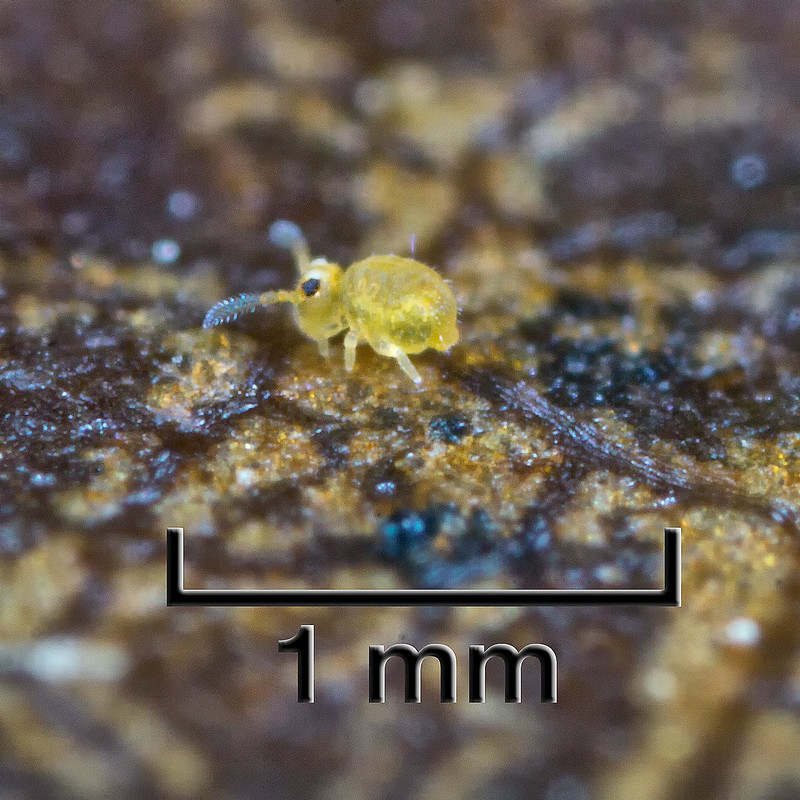
The first (and largest) was fairly obviously Pogonognathellus longicornis:
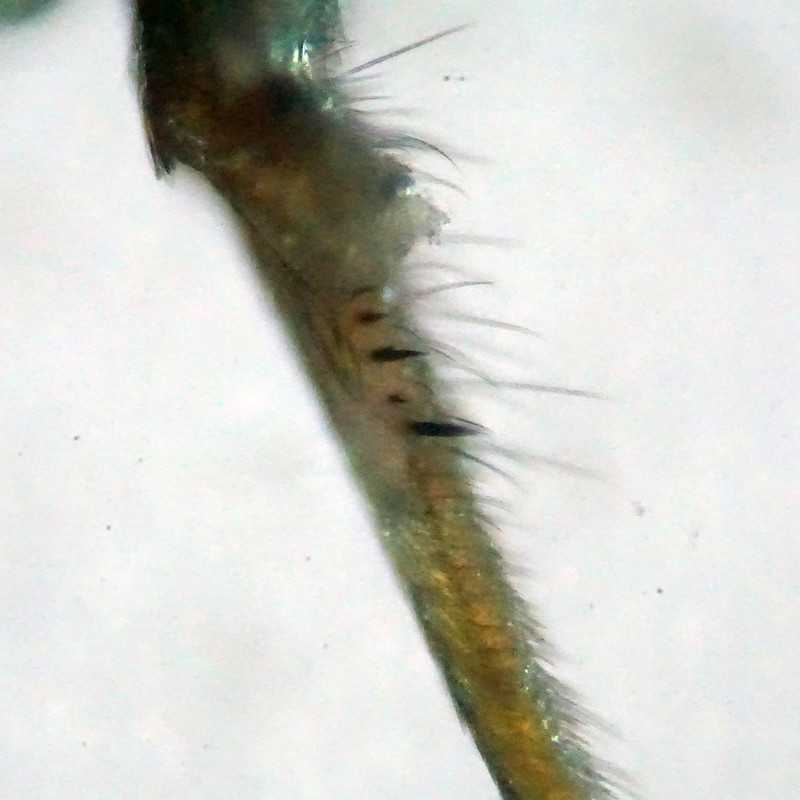
However, as the antennae were broken, I confirmed this by looking at the structure of the foot. In P. longicornis, the empodium is about 1.2 times as long as the claw due a thin filament on its tip (P. flavescens has no filament on any empodium):
The medium-sized specimen had some transverse banding on each segment and I thought it could be Tomocerus vulgaris:
To confirm this, I checked the structure of the spines on the dens of the furcula. Although this isn't the best picture, the spines were simple (not tridentate as in T. minor) so this is indeed T. vulgaris:
I guessed that the smallest specimen was probably Tomocerus minor:
Indeed, it had tridentate spines on the dens of the furcula, confirming the I.D.:
Three very common species, but now formally recorded in an area of Leicestershire where no-one has ever recorded any springtails before! They're out there!
Labels:
identification,
Pogonognathellus,
Tomocerus
Monday, 19 March 2018
Field Trip 17.03.18
The weather was so bad at the weekend that I didn't venture too far afield. By Saturday afternoon I had cabin fever and had to get out, so we walked over to the local churchyard to look for springtails. I'd had some quite good finds here in autumn looking under fallen leaves, such as Sminthurinus aureus:
On Saturday things were much more hard going. For 20 minutes we couldn't find any springtails at all. I put this down to sub-zero temperatures and the very low humidity. Based on this, I decided that the best bet was to look for arboreal species which tend to be a bit more resistant to low humidity. This worked and we found some springtails by beating Ivy. There were lots of Orchesella cincta and quite a few Entomobrya. I was particularly interested in these as I am still looking for Entomobrya nivalis without success - even though it is regarded as "common" and has been recorded in the area.
Entomobrya species are identified by dorsal pigmentation patterns but by this point it was starting to snow again, so we beat a hasty retreat and took specimens home for identification (getting back just before a complete whiteout descended). Not surprisingly, most of the specimens were Entomobrya intermedia, but there was one juvenile I wasn't sure about as it was without the bottom of the "broken U" with the corners missing which signifies E. intermedia:
However, this turns out to be merely a juvenile E. intermedia, so the quest for Entomobrya nivalis continues!
Labels:
Entomobrya,
field trips,
juveniles,
Orchesella
Thursday, 15 March 2018
Photographing Springtails
Why would anyone want to photograph springtails? I divide springtail photography into two main sorts, "artistic" - aimed not only at capturing a high quality image of the animal but also details of its behaviour and/or environment (Example 1 | Example 2), and documentary - aimed at capturing features of the animal for identification purposes.
There are two problems in photographing these animals - their size (the largest British species is about 6mm long), and that fact that they are very active. Although they don't fly away, when an image is magnified the depth of focus decreases which makes getting a small, active animal in focus very difficult. At magnifications of 1:1 and greater, depth of field is probably only 1-2mm - possibly the same size as the animal itself, and springtails can walk at several millimetres per second! Tricks frequently used for insect photography such as cooling to slow them down don't work on springtails - if anything, cooling them usually makes them more active! For all these reasons photographing springtails with a mobile phone is pretty much a non-starter, although with the addition of clip-on macro lenses, it is sometimes possible to get recognisable images of some of the larger species. Using a compact camera with a macro mode (and some practice), it's possible to identify about half of the larger species most of the time. For a better success rate and for all the smaller species, specialist equipment is necessary.
This is a list of the equipment I use to photograph springtails. This document is not by any means definitive and is constantly evolving as I try to improve my success rate. I have not written this recommending any particular piece of equipment or suggesting that anyone else sticks to what works for me - experimentation and finding the best method for you is needed. Much of this methodology also applies to other small insects and can easily be adapted. I'm also not going to recommend any suppliers as these change constantly, but you won't be able to walk into a shop and buy these items, so Google what you are interested in and buy from the most reputable supplier you can find (which may, or may not, be the cheapest).
Paintbrushes
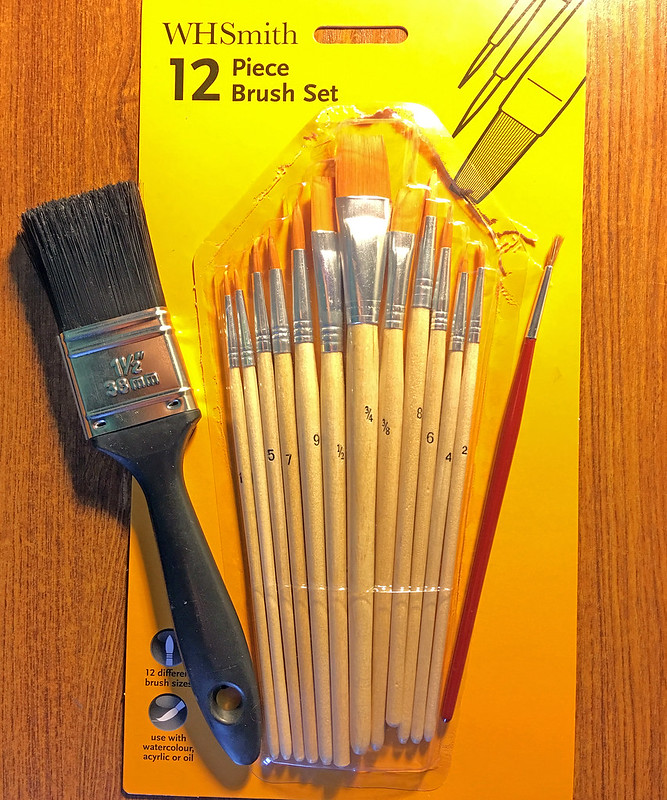
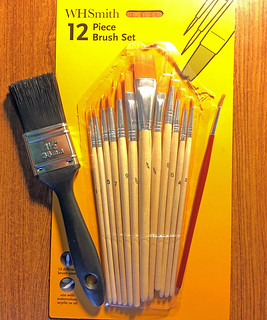
A frequent method of handing small insects is to use a pooter suction device. For springtails, I prefer to use paint brushes. A one inch paintbrush is very useful for harvesting springtails from logs, rocks, tree bark etc - just sweep them gently into a container. Small artist paintbrushes are good for gently wrangling springtails and persuading them to go in the direction you want! You can also use a wet artist brush to pick up springtails, although some species may lose scales which stick to a wet brush (e.g. Tomocerus). For these species it is better to persuade them to climb onto a dry brush to move them around without damage.
Compact Cameras
With practice, you can produce good images of the larger species using a compact camera with a macro mode. Clip-on Raynox lenses can produce some very good images and are a low cost solution, but they do have a very shallow depth of field and are quite tricky to use. Cameras without manual focus can be hit and miss and you'll need good light (something that springtails generally try to stay away from) to get good results.
Macro Lens and Flash
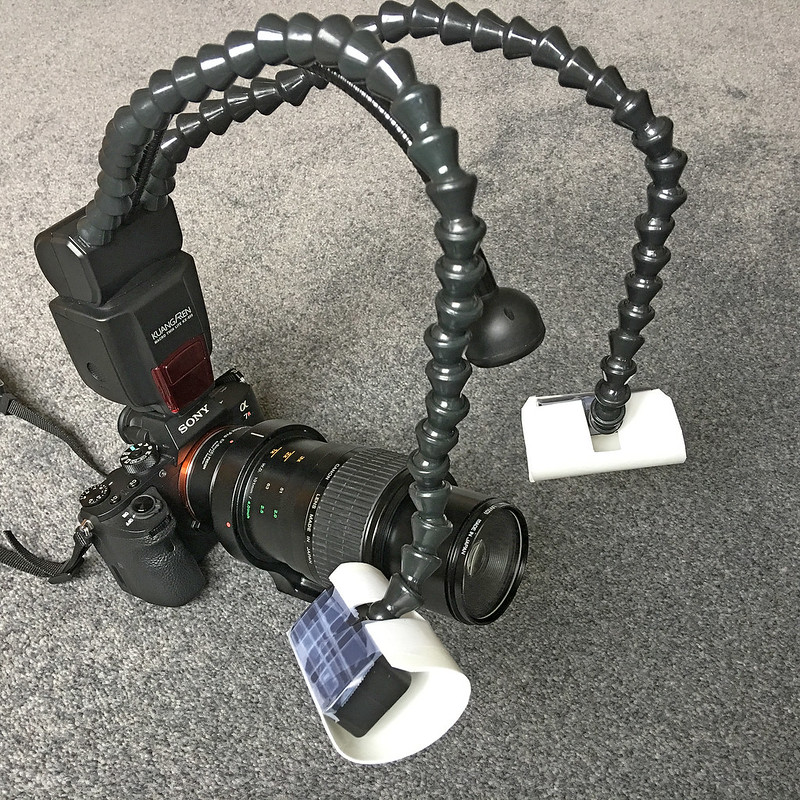
Interchangeable lens cameras (DSLR and mirrorless) allow the use of dedicated macro lenses. I have a "standard" macro lens which allows magnifications of up to 1:1, i.e. the image formed on the camera sensor is the same size as the real object. This is good for common species with recognisable features or patterns, but this will not produce images which allows identification of most species. Specialist macro lenses such as the Canon MP-E 65mm and the Laowa 25mm Ultra Macro Lens allow magnifications of up to 5:1 which aids identification of a wider range of springtails, including the smaller species. These lenses are difficult to use for two reasons: first the depth of field is very small and magnification makes motion blur a big problem, second because they are very light-hungry, so to produce usable images a flash is necessary, allowing higher shutter speeds to be used. A standard (or built-in) flash does not work, partly because the springtail is likely to be in the shadow of the lens itself, but also because they create very harsh lighting as such close range which obscures any detail in the subject. Flash needs to be directed and heavily diffused using some sort of home-made diffuser, or a specialist macro flash unit is needed. The Canon Macro Twin MT-24EX is very good on Canon cameras (and very expensive), but I use a Venus Optics KX800 Flexible Macro Twin Flash with 1mm thick craft foam diffusers to produce softer light and preserve specimen details. This specialist setup is pretty cumbersome and I don't use this in the field, only on collected specimens in more controlled conditions. Example 1 | Example 2
Microscope Adapter
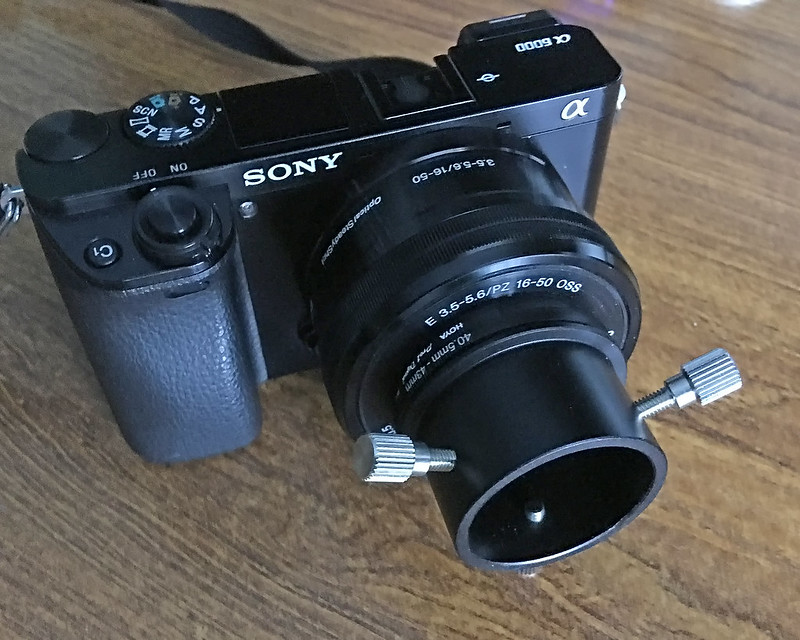
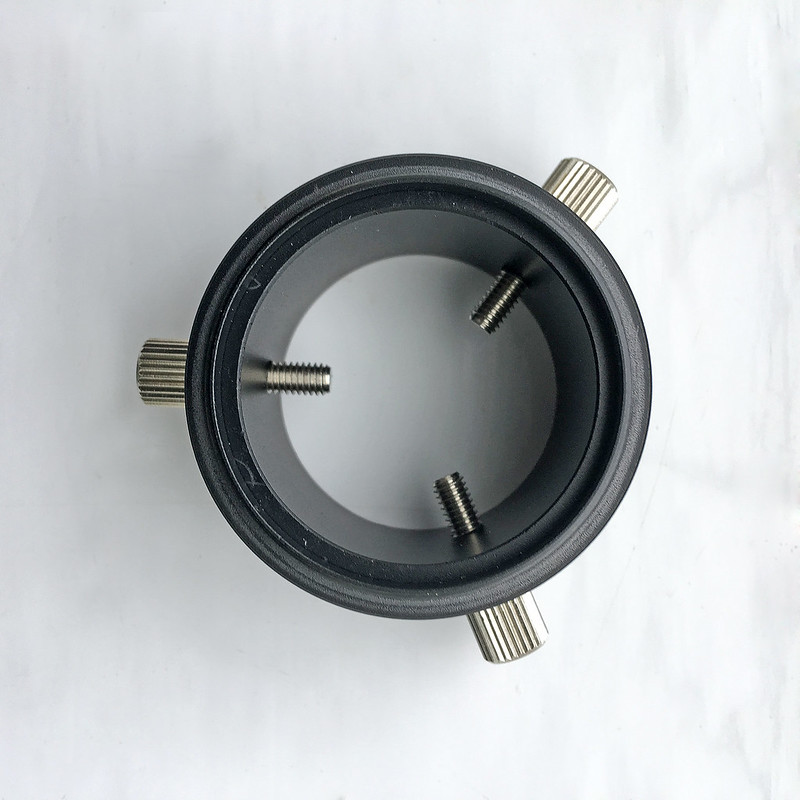
To identify a wide range of species you're going to need a microscope (see below), and a camera to capture images of what you see. I use this simple mechanical adapter which screws onto the front of a 50mm lens (see above) to attach my camera over the eyepiece of the microscope. Compact cameras can work very well for this, or you can also buy microscope-specific USB cameras to capture images directly to a computer.
Microscope
Low power binocular microscopes are very useful for examining springtails, but to visualize details of morphology frequently needed for identification, higher magnification is needed. I use a low-cost (for a microscope!) Apex Practitioner monocular microscope, giving magnifications of 40-800X. I can examine whole springtails at 40X magnification and use 200X or 400X magnification for features such as teeth, setae and ocelli. Lighting is experimental. Sometimes the transmitted light from the sub-stage LED system can produce good results but mostly reflected light is needed (or a combination of the two). I use two or three Ikea JANSJÖ LED lights with craft foam diffusers and play around with the lighting until I can highlight the features I'm looking for. You'll need to use a remote release and have the setup on a firm surface as vibration is a big problem at high magnifications. Example 1 | Example 2
Focus Stacking
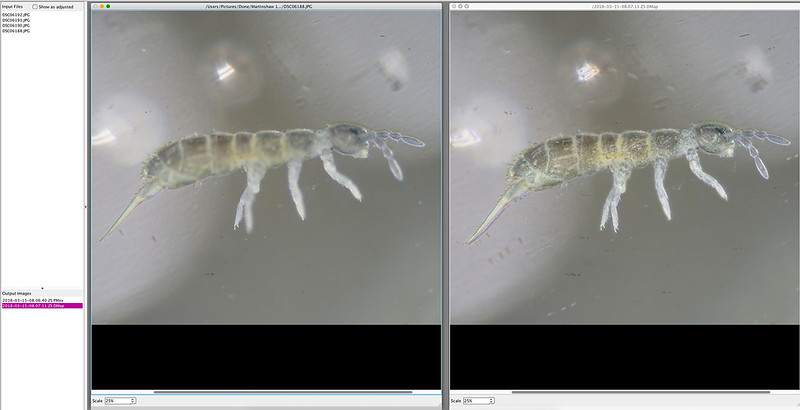
Whenever you magnify an image the depth of focus decreases. At magnifications greater than 1:1 the area in focus is often only 1mm deep, so if you're trying to photograph something bigger than this, you can't get it all in focus in one shot. Using a microscope, depth of focus is even smaller. There's no way around this problem, it's the laws of physics. Well actually, there is a way around. Using focus stacking software you can combine multiple images each with a slightly different focus to produce a composite image which is all in focus. You can do this using Adobe Photoshop, but specialist software such as Zerene Stacker (which I use) or Helicon Focus does a better job. This can get quite technical but it's an unavoidable part of ultra-macro photography. Example 1 | Example 2
70% Isopropanol
70% isopropanol is usually used to preserve springtail specimens and is available online. For long term preservation 95% ethanol is recommended, but this is virtually impossible for private individuals to buy. Vodka or gin will do in a push but you can buy 50ml of 70% isopropanol in a handy dropper bottle for a lot less. Needless to say (?) isopropanol is toxic and should not be consumed!
Microscope Slides
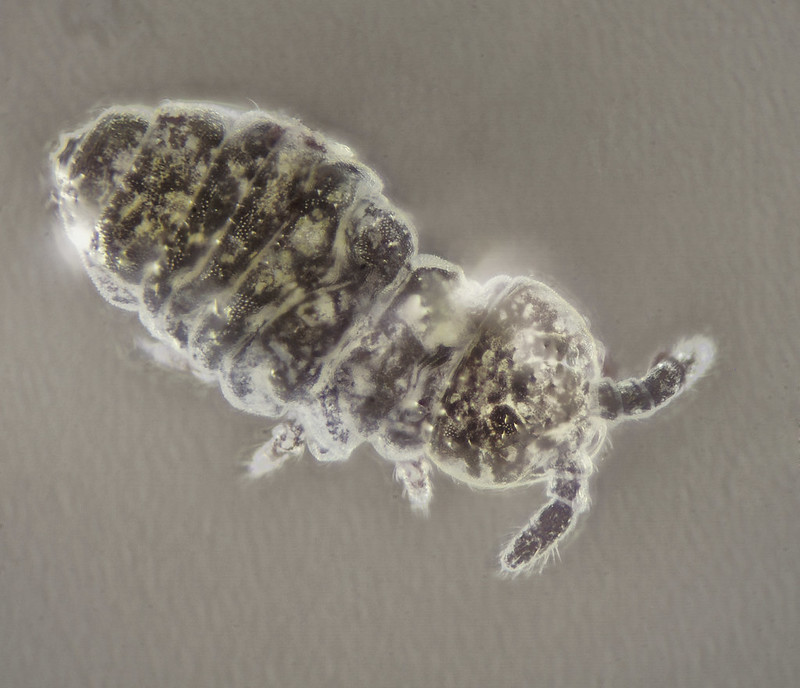
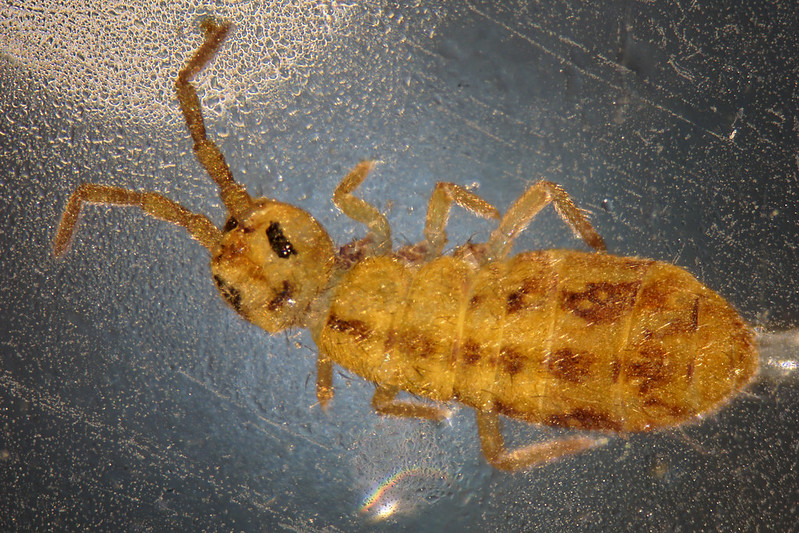
For microscopy, standard microscope slides can be used. However, if you float a specimen in a drop of liquid it can move around and this can make focus stacking difficult. Putting a coverslip on top of a springtail will crush it, so well slides are useful. These have a shallow depression on one side and can hold small specimens more stably. Example 1
The other type of well slide involves making a small corral with Blu Tack or plasticine. Plain microscope slides are best for this as they are flat and all on one focal plane:
Gently transfer a springtail into the corral with an artist brush and place another flat slide on top (use a slide as cover slips are too thin and will break). This requires patience and generally takes a few goes as springtails normally manage to jump out a few times before you get the lid on. Alternatively you can use paper or a leaf as the lower surface if you won't be examining it under a microscope and would like a more natural background with less reflections. When the animal is safely corralled, place the assembly on a flat surface and gently but firmly press down on the top slide until movement begins to be restricted - be careful not to damage or squash the springtail. The slide can now be photographed, or examined using a hand lens or under the microscope and it is easy to turn the slide over to examine ventral details. While this isn't the best method to obtain high quality photographs, it does save a lot of time if you need record shots of a large number of specimens and it also allows high magnification of living specimens. After examination the animal can be released unharmed:
Orchesella cincta furcula
Any questions, and even more important - is there anything I have missed?
Wednesday, 14 March 2018
Desoria
Desoria - covered in short setae (hairs); simple (unforked) setae by the feet; mucro has four teeth but does not possess a lateral seta, apical tooth is large (c.f. Isotomurus).
Isotoma - long setae on all body segments; mucro has three teeth.
Isotomurus - long setae on abd5+6 only; mucro has four teeth, apical tooth smaller than the others (c.f. Desoria).
Genus Desoria:
Desoria infuscata - very rare, upland sphagnum bogs.
Desoria tigrina - common, widespread. Dorsal plus lateral pigment stripes. Macrosetae on abd5 <0.7 length of adb5. (All UK literature records for 'Isotoma olivacea' are probably Desoria tigrina.)
Desoria trispinata - probable horticultural import. No macrosetae on abd. Looks like Vertagopus arboreus but with blue rather than pale legs. Eight ocelli in a rectangular eyepatch, c.f. four in a square patch for Parisotoma notabilis. Nine setae around the feet c.f. eleven in Isotoma.
Desoria violacea - common, widespread. Dark colour with blue/violet iridescence. Macrosetae on abd5 approximately same length of adb5.
Desoria tigrina
"Desoria tigrina (formerly Isotoma tigrina) is widespread and common, with a tendency towards human-impacted soils or habitats rich in organic matter. Desoria tigrina is light to dark grey or brown (never white, dark blue or violet)."
- No macrosetae
- Ocelli B-D-E aligned
- Mucro with 4 teeth and no lateral seta
- Long setae on Abd5 <0.7 length of Abd5
Desoria trispinata - Photo Marie Huskens:
Desoria violacea:
Labels:
Desoria
Hypogastruridae
These are the ones that got away - very difficult group to identify to species level:
11.03.18 SK508071 ~1mm in Beech leaf litter:
Roundish mouthcone, 2 anal spines.
11.03.18 SK508071 ~1mm in Beech leaf litter:
Roundish mouthcone, 2 anal spines.
Labels:
Hypogastruridae
Tuesday, 13 March 2018
Isotomurus palustris
Desoria - covered in short setae (hairs)
Isotoma - long setae on all body segments
Isotomurus - long setae on abd5+6 only
The "Isotomurus palustris" group contain some of the commonest and most widespread springtails in the UK. In Isotomurus palustris sensu stricto, the central stripe is prominent and unbroken except at the dorsal margins of tergites, with a mottled pattern on the flanks.
Ocelli:
Claw:
Labels:
Isotomurus
Saturday, 10 March 2018
The Brush Off
Some species of springtail can reliably be found in certain environments, e.g. Anurida maritima on the seashore, Entomobrya nivalis climbing up vegetation and grazing algae from tree trunks. Entomobrya nivalis is a bogey species for me. Although it is "very common", I've never found it! So I armed myself with my trusty paintbrush and a pot of invisible paint and went off to give the fruit trees in the garden a couple of coats of nothing but air. Getting into all the cracks and under bark flakes I could see the springtails raining down into the white plastic tub I was holding against the tree, and then, since it was flipping cold, I took them indoors to search for the elusive nivalis (more on paintbrushes here).
The first thing I found, fairly predictably, were lots of Entomobrya intermedia. Unlike E. nivalis, E. intermedia is truly common in these parts, but this was an encouraging start.
Entomobrya intermedia
One of the nice things about Entomobrya species is that they can fairly easily be identified from dorsal pigmentation patterns, and thus from photographs. E. intermedia has a characteristic broken “U” (the corners are missing) on abd.5/6 and a “W” across the top of abd.4. So far so good. After wading through all the intermedia, next up was a single specimen of Entomobrya multifasciata:
This species is characterised by the pair of triangular patches of pigment pointing forwards on the posterior margin of abd.4. Unfortunately it can be confused with female Entomobrya nigrocincta (a sexually dimorphic springtail), but I'm confident about this one and also very pleased as this is a new record for my garden. Sadly, at this point it all went a bit pear shaped. Sorting through the smaller specimens, I started to find a lot of these:
This tripped me up and caused a lot of head scratching trying to match up abdominal pigmentation patters with, well anything really. I'd become fixated on Entomobrya and failed to consider the other possibilities - rookie error. It wasn't until I found an adult and with assistance from Frans Janssens that the penny dropped:
Orchesella cincta
Unlike the juveniles I'd been finding, adult O. cincta are much darker - males are completely black (except for the white bands), females are less black and more spotted/patterned. This male is a bit battered and has lost quite a few scales and hairs so it's not a typical specimen but still quite recognisable. What I'd overlooked was that Entomobrya have 4 antennal segments, in Orchesella ant.1 and ant.2 appear to be divided so there appear to be 6 antennal segments (have another look at the juveniles above). The other problem is that all the instars of O. cincta appear different to each other - the first one above is a juvenile, the second one (with more dark pigment) is a subadult, but if you look at the antennae, you can see that they are not Entomobrya. Once again thanks to Frans Janssens for sorting me out.
Not a bad return on a pot of invisible paint! I may apply for Sky Arts Invisible Artist of the Year.
Labels:
Entomobrya,
methods,
Orchesella,
sampling,
trees
Subscribe to:
Posts (Atom)